Showing posts with label Beauty Tips. Show all posts

Thursday, March 29, 2012

Beauty tip #11 Homemade Facials


Why pay for expensive facials when you already have all the ingredients and you can make them yourself?? You can make your own masks, scrubs, or even moisturizers. It's all up to you!! You could even make them for oily, dry, or sensitive skin! Here are some of the ones I have tried and some that are highly recommended.

Dry skin:

    1. Avocado and honey mask: This mask is great for dry and even mature skin. Take half of an avocado and 1/4 cup of honey and mash it up really well. Leave for 10 min and rinse with cool water.

    2. Brown sugar scrub: This scrub is from the founder of Korres Natural Products. She says that sugar is a great exfoliator because of the grains. What you do is mix 1-2 tablespoons of brown sugar with 1-1 1/2 teaspoons of either olive oil or coconut oil. Massage in circular motions and rinse with warm water. Be sure to moisturize.

Oily skin:

    1. Strawberry mask: Strawberries are a great natural source of acid. Acid is known to be great for acne. Mix 1/4 cup of fresh strawberries with 1/4 cup of sour cream or non flavored yogurt. Mash them together and leave on for 10-15 min. Rinse with cool water.

    2. Honey banana mask: Mix 1 ripe banana with 1 tablespoon of honey and a lemon. Mash banana and honey together then add a few drops of lemon. Leave on for 15 min and rinse with cool water.

Sensitive skin:

    1. Olive oil and avocado mask: Mix 1/2 teaspoon of olive oil with 1 1/2 teaspoon of avocado. Chill it for a little then apply to face for 5-10 min. Rinse and moisturize.

    2. Oatmeal and yogurt mask: Mix 6 ounces of plain yogurt with 1/2 a cup of instant oatmeal and 2 teaspoons of honey. Leave on for 15 min then rinse. 


These are just a few good ones that I've used and that others have really liked. Oh, and also to top it off try cucumber slices on your eyes for any of the masks. If you'd like me to post more please let me know!!

Please share how they work for you :)

Stay beautiful<3

Wednesday, March 14, 2012

Beauty tip #10 Getting Rid of Blackheads


Do you have pesky blackheads that seem to never go away? Don't have enough money to get regular facials?? I know the feeling!! I've had an on going battle with black heads for a few years. They seem to always come back and especially around my nose area.

Finally, I did some research and tried some remedies out. Some of them worked great and some of them didn't make too much of a difference for me.. but maybe they will for you!!

Methods:
  1. Steam: This is one of the most effective ways for me. ( Not to mention one of the easiest ) There's a couple ways to steam! One way is by purchasing a steamer. You could find steamers at any beauty supply or even at a Wal-Mart or Target. Another way is when you get out of the shower. The steam from the shower acts as your personal steamer! It softens your skin and opens your pores so it'll be easier for you to extract all that gunk!!  One more way to steam is by getting a towel and wetting it a little then microwaving it for about 30 seconds. Apply the towel to the area that you want for a few minutes then extract.
  2. Elmer's Glue: I know, I know... this sounds very weird, but people swear by it! Here's how: Wash your face with a mild cleanser. Steam the area with a warm towel. Dry the area. Now the weird part haha... Apply a medium layer of glue and let it dry completely! This is the key step... it has to dry COMPLETELY!! This sort of acts like a pore strip. Once it's dry peel off!
  3. Squeezing: I don't recommend this method too much unless you steam first and only if the blackhead is ready to come out! The reason why I don't recommend squeezing too much is because this sometimes leads to scarring if the blackhead isn't ready!! Scarring is the last thing you want! But if that bad boy is ready to come out, by all means, squeeze him out!!
  4. Toothbrush and Toothpaste: Again, a weird one, but it might work for you! First, make sure its a toothbrush you don't use anymore or a new one that's only for this! Also, make sure its a soft head toothbrush. You don't want to rip your skin off. Apply a small amount of toothpaste to your toothbrush and wet it. Next wet your nose or whatever area you're scrubbing. Gently start scrubbing the area in circular motions. Not too hard!! This acts as an exfoliator. A little tip... don't get too close to your eye area because it might affect your eyes with the menthol or whatever ingredients your toothpaste has. Treat the area for at least a week to see results.
  5. Honey: This one is pretty simple. All you have to do is warm some honey up for about 10-15 seconds. Apply to the area. Let sit for about 10-15 min. Wash off and moisturize. Treat for at least a week for results.
There are plenty of other methods out there but these are just some of the ones I've tried. Let me know if you use any of these and what your results are!

I'd love to see before and after pictures too!!

Let me know if you have any questions !! 

Stay beautiful <3

Sunday, March 11, 2012

Beauty tip #9 Baking Soda


Ever wonder about sodium bicarbonate A.K.A baking soda??? There are over 50 well known uses for this household product! Baking soda is a great substitute for personal care products and any cleaning products. Here are 10 great uses I know of for sodium bicarbonate:


  1. Funky Smelling Fridge: Baking soda is known to neutralize any acidic smells... like those funky smells in your fridge!! The baking soda soaks up those yucky smells. Just put a box of baking soda on one of the shelves in your fridge! Smells should be gone in no time!
  2. Laundry: Sprinkle some in your washer after you pour your detergent in. Baking soda maintains the neutral pH in your detergent and water. It gives a nice little boost to your detergent. 
  3. Toothpaste: Want to boost your pearly whites?? Baking soda is great for your teeth and the enamel in your teeth. You could go as far as making your own toothpaste but what I do is dip my toothbrush in a little bit of baking soda after I put my toothpaste on. And brush away!!! Remember... not too hard! Also another great way to make your teeth appear whiter is by wearing red lipstick!! Shh.. it's a secret!
  4. Facial Exfoliator: Mix 3 parts baking soda to 1 part H2O!!! Mix together and apply to your beautiful face in a circular motion!!
  5. Heartburn: Burn no more!!! On your baking soda box there should be some instructions and how to mix it to get rid of heartburn!!
  6. Hand Cleanser: Mix some baking soda in with your hand soap!! Rub on your hands and rinse with warm water. Moisturize after.
  7. Clarifying Shampoo: Got some residue or gunk on your hair? Mix some baking soda with your shampoo and lather up! If your hair is colored reduce the amount of baking soda you mix in.
  8. Clean Your Make Up Brushes: NO DIRTY BRUSHES ALOUD! Mix a teaspoon or so with luke warm water and soak your brushes. Rinse and allow to dry.
  9. Treat Your Feet: Dissolve 3 tablespoons of baking soda to a tub of warm water. Scrub away!!
  10. Clean the Rust off Your Car Battery: Now, I wouldn't normally know this but I saw my boyfriend use this on my car battery. What he did was mix lemon and baking soda and rubbed the battery with a cotton swab! It left my battery looking brand new and cleaned all the residue off!! Be sure to disconnect the battery before.


These are a few I know of for myself. If you know any other uses please feel free to comment and let me know!
If you try any of these, contact me and let me know your experiences!
I would love to hear from you. Hope these help!

Stay beautiful <3

Tuesday, February 21, 2012

Beauty tip #8 Vitamin E Oil


Do you have dry skin?? Cracked lips? Eczema?? Or even circulatory problems?? Vitamin E oil is know to be the wonder oil!! Theres are so many uses and benefits from using Vitamin E oil and here are some of them:


  1. Soft skin: This is one of the ways I have personally used it. I have very very dry skin/ eczema on my arms. I've used different lotions and soaps and none of it has worked. For the past month and a half I have been using it right after I get out of the shower and before I go to bed. ( I also use it on my face)  I have noticed such a big difference in my skin and it feels and looks amazing!! Another little tip... you can also warm up some oil in the microwave for about 10 seconds and then rub it on. Works like you wouldn't imagine!!
  2. Scars or marks: Vitamin E oil is known as the "healer". You are supposed to apply twice a day to take scars away. And it's more packed with nutrients if you get the capsules and just break them open. I have also used it for scars on my arms and hands. I had a little treadmill accident a while ago ...oopsies... and I applied Vitamin E oil for quite a while and it made the scars much lighter. They aren't completely gone but it helped tremendously!
  3. Avoid getting skin cancer: This is a big one guys!!If you just apply a few drops to your sunscreen, you'll be set! Its a big protector!!
  4. Shiny hair: Massage in to your hair and scalp. Focus on scalp and ends of your hair. There's two way to do this. A mask that you have to wash out or a leave in. For the mask, warm up a good amount of the oil and apply generously to hair and scalp. If possible wrap around your head and apply heat. Wash out after. For the leave in, don't apply too much and then just style after.
  5. Sunburn: Cools and soothes when you have a sunburn. Feels great and gives your skin a little break from the pain!
  6. Anti-Aging: Prevents cells and tissues from oxidizing. This is what gives wrinkles and lines. Apply over problem areas.
  7. Dry Cuticles: Really softens up dry cuticles. Keeps them looking nice and moisturized!!
  8. Massage: Great massage oil!!! Especially warmed up. Feels great on hands and feet!

Hope this helps out. I really love vitamin e oil ( as you can tell from my picture up top, it's almost gone haha). Try it out and let me know your thoughts or results with vitamin e oil!!

Stay Beautiful <3

Wednesday, January 25, 2012

Beauty tip #7 Runny & creasy eyeliner


Hi everyone. Sorry I've been M.I.A for a few days. Unfortunately I've been feeling a little under the weather. But I've been thinking about my next post the whole time :) So here we go...


One problem that I used to have all the time, before I used these little tricks, was runny eyeliner. I would apply my eyeliner and before I knew it... it was all over my lids and under my eyes. It was a BIG BIG BIG problem for me!! 


I tried buying different brands of eyeliner and went from pencil to liquid and to gel, and even then I would still get some creasing and running. What I did notice is that the gel seemed to work the best for me!! And one more big thing I was doing wrong was making my line too thick. My eyes are a little smaller, so with the thick lines I was making I would have eyeliner all over the creases of my eyes. 


So here's a few tips that worked out really well for me:

  • If you have smaller eyes like I do, keep your top eyeliner thinner. Experiment with different line sizes. You'll find the perfect size!!
  • If you have larger eyes, then in my eyes, you're lucky. hehe. You have the choice to either do a thicker or thinner line depending on what you like.
  • Try different eyeliner types. I tried pencil, liquid, and gel. I stuck with gel for the top!!!
  • The best way to keep your top eyeliner from creasing ( in my opinion ) is... after you line your lids, dip any angled brush in the same color eye shadow as your eyeliner. Ex: If you lined your eyes with black eyeliner, use black eye shadow. Once the eye shadow is on the brush go over the liner with the shadow. This seals the liner and should keep your eyeliner fresher for a much longer time!!
  • And for the bottom liner... also experiment with either pencil, liquid, or gel. Or in my case, I use a combo. 
  • What I do for the bottom is right under my waterline I use a gel liner or eye shadow. I use the same angled brush that I use for the top and run it right under my bottom lashes. This keeps my bottom liner from running under my eyes.
  • Then I take a pencil liner and tight line my eyes. I use it on my waterline on the bottom. This just gives it a more finished look.
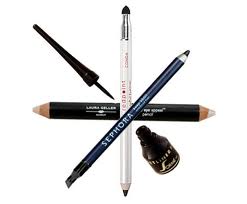
P.s. My favorite favorite gel liner is Maybelline Eye Studio gel liner in black !!! I absolutely feel lost without it!! And for the pencil my favorite is Urban Decay's 24/7 double ended eyeliner.


Maybelline EyeStudio Gel Liner

Urban Decay's 24/7 Double Ended Pencil Liner

I hope this helps out ladies. It really works for me and for those I've used it on! Any questions please let me know. Stay beautiful <3

Tuesday, January 17, 2012

Beauty tip #6 Dry shampoos


Need to get somewhere fast? Don't have enough time to wash your hair, dry it, and style it?? Dry shampoo is the way to go!! Dry shampoos not only buy you time between washes... which is great because you aren't supposed to be washing your hair everyday anyway... but they also give your hair a little umph after. Dry shampoos are also known to take away the itch, improve the smell, and eliminate the good ol' oily look that we all love soooo much! 
They come in powder form, foams and sprays. What dry shampoos do is absorb the oils that are in your hair. For many years what people would do is actually use baby powder... which I sometimes still do.  Some dry shampoos are even known to extend the life of your hair for an extra 5 days before you wash it. 
The way to pick the right dry shampoo for your hair is to match it up with the description they have on the product. Yes, it's as easy as that. They've got some for blondes, brunettes, and even reds. They've got dry shampoos for curly hair, straight hair, frizzy hair... you name it. 

One of my favorites is "Oscar Blandi Pronto" dry shampoo. This one is sold at Sephora for about $11. It is a little pricey for the size of the bottle, but very well worth it! It also has a nice fresh lemony scent!!

Another good one is "Pssssst" Instant dry shampoo. This is a good one for us curly haired people :) It refreshes and doesn't weigh down your beautiful bouncy curls. This one's only $6.99 at Ulta.

A good one for dark hair is "Batiste" original dry shampoo. This brand carries many different scents and comes for all different colors. They have have some that give you that extra volume and extra shine!! And best of all... it's not going to break the bank!! This one is only $9 at most drugstores!!

There are plenty more out there ladies. You've just gotta get out there and experiment with them and the different types that are available to you!! There will be one your hair will fall in love with.

These are the steps for most dry shampoos:

  1. Brush your hair. Make sure all those tangles are out!!! This also helps with evenly distributing all oils and gunk you've got in there so your dry shampoo will work correctly.
  2. Part sections of your hair and apply at the roots and on your scalp. Apply wherever you feel necessary. P.s. It might look a little scary after this step. Don't worry.. it gets better!
  3. Massage dry shampoo into your scalp. Try using the same motions as if you were applying regular shampoo. MAKE SURE YOUR HANDS ARE CLEAN!! You don't want to add more grease and gunk to your hair. 
  4. Wait 3-5 minutes to allow shampoo to absorb everything.
  5. Comb through your hair. I do this step with my head upside down and over the bath tub or sink to eliminate a big mess.
  6. Flip hair over and enjoy your "clean" hair :)
Tips: I've noticed that with any dry shampoo, a little goes a long way. Start with a small amount. You could always add more!!

I hope this helps ladies!! Any questions please comment!! Stay beautiful <3


Friday, January 13, 2012

Beauty tip #5 Dull Looking Hair


Dull looking hair?! Nobody likes that!! There are many things that contribute to dull lifeless hair!! One of the main reasons for the dryness and split ends is HOT WATER!!! I'm very guilty of this! I love me a HOT shower!! Unfortunately, it's terrible for your hair. Hot water strips off all natural oils from your hair and dries it out. Yuck!!! 
Try washing your hair with cooler water. I know it sounds hard, but it's so much better for your beautiful hair. What I do is turn the water a little cooler when I'm going to rinse out my shampoo and conditioner. One thing that also makes a big difference is the type of shampoo and conditioner you feed your hair! :) I know the cheaper ones are much more convenient to buy but, they are really damaging your hair. Trust me ladies, if you invest in some good shampoo and conditioner, you will notice the difference!! My first choice in shampoo and conditioner right now is Joico KPak! It has made such a big difference in the way my hair looks and feels! Experiment with different shampoos and conditioners. You will eventually find one that your hair loves! 
Also, if it's possible, try going a couple days without washing for hair. Your hair needs those natural oils to be nice and strong for you. If you're using heat on your hair daily, whether it's blow drying, straightening, curling, or crimping, please please please use a heat protector before you apply the heat. Paul Mitchell has a great serum called "super skinny"! I love it! Let's keep our hair looking and feeling healthy and happy!! Stay beautiful ladies!! 


Thursday, January 12, 2012

Beauty tip #4 Long Lasting Foundation


Does your foundation fade throughout the day??  Want it to last longer and still look fresh?? Use a face primer! They are life savers!!! There are so many out there and cheap too! My favorite face primer is Samshbox Photo Finish. Smashbox has so many different primers depending on what type of skin you have, if you've got acne or blemishes, or if you just want a smooth clean look. Ill post some pictures below on their different types. Ok, here are the steps!
  1. First, make sure you wash your face! It's always much better when you start with a fresh clean face.
  2. Remember... Moisturize, moisturize, moisturize!
  3. Let your moisturizer set before you apply your primer.
  4. Apply your favorite primer all over your face. Its up to you if you want to put it over your eyelids. I do :)
  5. Now here you could either apply your concealer or foundation. Some like applying concealer before foundation and others like applying concealer after foundation. It's really up to you. Sometimes you could even do both before and after depending on the look you are going for. I like to apply concealer after my foundation. 
  6. Now you could set your foundation. There's many different setting powders out there. I like using a translucent one so it doesn't make me lighter or darker.
Now if you're a more natural kinda girl, just mix some of your foundation with your moisturizer. Mix as much as you'd like. It's up to you how natural you want it to look. Ok ladies, hope this helped. Any questions, ask away!! Stay beautiful!!

Here are some of the different Smashbox primers:

Smashbox Photo Finish
My favorite!!

Out of these 3, I like the green one better. It covers any red spots you've got.

Wednesday, January 11, 2012

Beauty tip # 3 Short eyelashes?


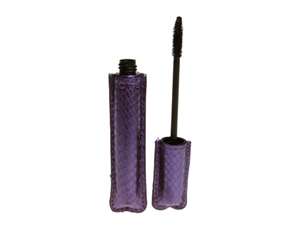
Uh oh!!! Here's my big problem!! If any of you have the same eyelash problem as I do, here's a little trick for you. It seems to work for me and for those I've tried it on. Its worth a try right?! What I do is find a mascara with a pretty short wand. The short wand lets you get right to the base of your eyelashes. And ladies, that's where we need that little boost. Just like when we tease our hair! For me, the shorter the wand the better. I have a few "go to" mascaras that I love and aren't very expensive at all. I'll put some pictures bellow this post of a few of my favorites.
What you need to do first is curl your lashes. Once you've curled them, if you've got some, apply some mascara primer. It's usually a clear or white-ish color. This just makes your mascara last longer and gives your lashes a little boost. Once curled, get your mascara and start on the outer corner of your eyes. Be sure to wiggle your wand as close as you can to the base of your lashes. Keep doing that to all your lashes and go over them a couple times just to make them a little thicker. 


Oh and a quick tip ladies, when your dipping your wand back in for more mascara don't pump the wand, instead roll it around the edges. The more you pump, the dryer your mascara gets!!!
If this still isn't enough for your lashes, try some individual lashes!! They work great and look very natural . Hope this helps!! Stay beautiful ladies <3


Here are some of my favorite mascaras:


Tarte mascara


Selma Hayek's mascara Nuance

Great Lash mascara

Tuesday, January 10, 2012

Beauty tip #2 Dry lips?

Dry lips?? OUCH!!!! Winter or not... dry lips are always a no no!Unfortunately we aren't all blessed with beautifully smooth, soft, and moisturized lips. I've got a little trick for you :) All you need is a washcloth or toothbrush. If using the washcloth make sure its gentle. If you use a rougher tougher one, it will hurt :( Same for the toothbrush. I recommend using a soft head toothbrush. Trust me... if its medium or hard your lips could turn out worse. You still want to be left with some lips right. hehe. Here are the steps.

  1. Wet your lips a little with some good quality h2o.
  2. Grab your washcloth or toothbrush and also wet them.
  3. In small circular motions go over your top lip and bottom lip for about 60 seconds... Remember, not too hard, be gentle.
  4. When you're done, wipe off any excess water or skin from your lips.
  5. For the best results make sure you moisturize, moisturize, moisturize! A little vaseline works best for me.
  6. Now you've got beautiful kissable lips!! Just apply your lipstick and gloss and you're ready to go! Goodluck and remember Stay Beautiful <3


Monday, January 9, 2012

Beauty tip #1 Coconut oil


Ok ladies here's my first tip for you.Its all about coconut oil and coconut water. Do you want glowing and clear skin??? Wash your face with coconut oil or coconut water!!! Coconut oil is A-mazing!!! It has a million different uses. My favorite being for beauty purposes of course. Its extremely moisturizing and restores all proteins lost in your skin and hair/scalp. It helps out tremendously with dry skin!! And for coconut water... just use it as you would regular water when washing your face. For some.. like me.. that might get expensive at times since you're just splashing it on your face but, theres a better more effective way of using the coconut water! Just drink a glass everyday and you should have glowing beautiful skin in no time. Wondering where to buy them for a reasonable price??? Walmart sells coconut oil  in a tub for about $10. Have a whole foods or trader joes near by?? They sell them there also. Hope this helps out! Stay beautiful <3